COMMAND>_ for developers
In order to add new features to COMMAND>_ you’ll need to stick with the whole framework. As a demonstration we will create a basic page to retrieve some data from the database and show them in a grid within COMMAND>_. So we will take care of:
- create the ExtJS interface;
- create the Python view;
- create the permission to access the view;
- make an AJAX call passing parameters;
- perform a job on celery to run in background;
- handle websocket to show the results on a grid;
We will also see how to extend COMMAND>_ functionalities such as how to add a new public database users can use to perform search on, how to add a new platform type and so on.
Note
For anything else related to the interface design please refer to the ExtJS documentation. While to properly add new models and extend the Data Model, please refer to the Django documentation
Add brand new feature in COMMAND>_
Create the ExtJS interface
COMMAND>_ is a single-page application, so everything you see runs within one HTML file and the Javascript code needed to display the interface is loaded and managed by the ExtJS framework.
All ExtJS interface files (views) live within the directory command/static/command/js/ext-js/app/view. So let’s create a test directory in here and, within that directory let’s create 2 files: Test.js and TestController.js.
Let’s fill these two files with some basic code like the following:
// Test.js

Ext.define('command.view.test.Test', {
  extend: 'Ext.Component',

  xtype: 'test',

  title: 'Test',

  requires: [
      'Ext.panel.Panel',
      'command.view.test.TestController'
  ],

  controller: 'test',

  store: null,

  alias: 'widget.test',

  itemId: 'test',

  reference: 'test',

  viewModel: {},

  html: 'TEST',

  listeners: {
      //
  },

  initComponent: function() {
      this.callParent();
  },

  destroy: function() {
      this.callParent();
  }
});
// TestController.js

Ext.define('command.view.test.TestController', {
  extend: 'Ext.app.ViewController',

  alias: 'controller.test'
});
Now you will need to run the command sencha app build from within the command/static/command/js/ext-js directory.
Note
To use the sencha app build command you will need to download and install Sencha CMD
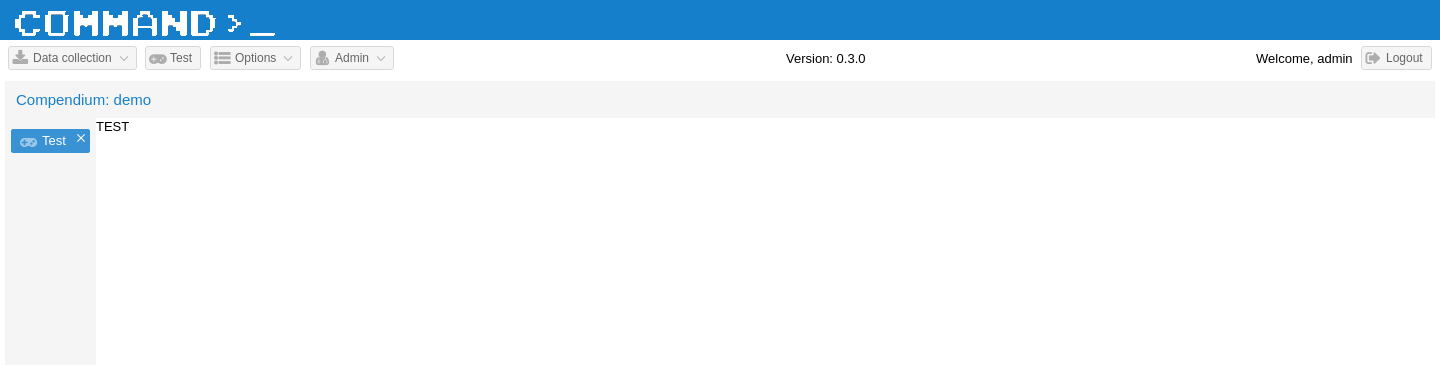
Now you should be able to point your browser to http://localhost/#view/test and see that the Test panel has been correctly loaded as a tab within the main application panel. To make it reachable with a button and to add a small icon next to the tab name we should edit two files, Main.js (here) and Application.js (here).
100 101 102 103 104 105 106 107 108 109 110 111 112 113 114 115 116 117 118 | // Main.js
// Add the ``Test`` menu button
},{
text: 'Test',
itemId: 'test_menu_item',
iconCls: null,
glyph: 'xf11b',
listeners: {
click: {
fn: 'onAction',
hash: 'view/test',
glyph: 'xf11b',
panel: 'test'
}
}
},{
text: 'Options',
...
|
34 35 36 37 38 39 40 41 | // Application.js
// Add the ``test`` glyph
version: null,
panel_glyph: {
'test': 'xf11b',
...
|
You should see something like the following:
Create the Python View code
Now let’s create a grid, a basic double-click event and a link to a Python view. First of all we need to create the test.py file within the views directory (here). The basic view file should look something like that:
 // test.py

 import json
 from django.http import HttpResponse
 from django.views import View
 from command.lib.utils.decorators import forward_exception_to_http


class TestView(View):

   def get(self, request, operation, *args, **kwargs):
      method = getattr(self, operation)
      return method(request, *args, **kwargs)

   def post(self, request, operation, *args, **kwargs):
      method = getattr(self, operation)
      return method(request, *args, **kwargs)

   @staticmethod
   @forward_exception_to_http
   def test(request, *args, **kwargs):

     return HttpResponse(json.dumps({'success': True}),
                         content_type="application/json")
The test function does nothing at the moment and is meant to respond to an Ajax call. We’ll see that within the same TestView class we will put both code to manage Ajax and WebSocket requests. Before we add any business logic code we need to tell COMMAND>_ that the ExtJS view test will make requests to the Python view TestView and that users need no specific privileges to do that (for the moment). So let’s add one line in the consumer.py script (here):
34 35 36 37 38 39 40 41 | # consumer.py
class Dispatcher:
dispatcher = {
...
ExportDataView: ['export_data'],
TestView: ['test']
}
|
Add a grid to the ExtJS interface
So far, so good. Let’s remove the HTML code from the Test.js file and let’s add a grid to show all the experiments for the selected compendium. The file will now look like this:
1 2 3 4 5 6 7 8 9 10 11 12 13 14 15 16 17 18 19 20 21 22 23 24 25 26 27 28 29 30 31 32 33 34 35 36 37 38 39 40 41 42 43 44 45 46 47 48 49 50 51 52 53 54 55 56 57 58 59 60 61 62 63 64 65 66 67 68 69 70 71 | // Test.js
Ext.define('command.view.test.Test', {
extend: 'command.Grid',
xtype: 'test',
title: 'Test',
requires: [
'Ext.panel.Panel',
'command.view.test.TestController'
],
controller: 'test',
store: null,
alias: 'widget.test',
itemId: 'test',
reference: 'test',
viewModel: {},
mixins: {
getRequestObject: 'RequestMixin'
},
command_view: 'test',
command_read_operation: 'test_read',
listeners: {
//
},
columns: [{
text: 'Accession',
flex: 2,
sortable: true,
dataIndex: 'experiment_access_id',
}, {
text: 'Experiment name',
flex: 2,
sortable: true,
tdCls: 'command_tooltip',
dataIndex: 'experiment_name'
}, {
text: 'Scientific paper',
flex: 2,
sortable: true,
dataIndex: 'scientific_paper_ref'
}, {
text: 'Description',
flex: 2,
sortable: true,
tdCls: 'command_tooltip',
dataIndex: 'description'
}],
initComponent: function() {
this.store = Ext.create('command.store.Experiments');
this.callParent();
},
destroy: function() {
this.callParent();
}
});
|
Please note that:
- at line
4we extendcommand.Grid;- at line
31we are saying to COMMAND>_ the view to be used;- at line
33we are declaring the default read operation (i.e. the default Python function to be called);- at line
64we are declaring the ExtJS store to use.
Link the ExtJS grid to the Python code via WebSocket
The test.py Python view file will have a test_read function that will look like the following:
# test.py

@staticmethod
@forward_exception_to_channel
def test_read(channel_name, view, request, user):
   channel = Channel(channel_name)

   start = 0
   end = None
   compendium = CompendiumDatabase.objects.get(id=request['compendium_id'])
   if request['page_size']:
      start = (request['page'] - 1) * request['page_size']
      end = start + request['page_size']
   order = ''
   if request['ordering'] == 'DESC':
      order = '-'

   query_response = Experiment.objects.using(compendium.compendium_nick_name). \
      filter(Q(experiment_access_id__icontains=request['filter']) |
             Q(scientific_paper_ref__icontains=request['filter']) |
             Q(description__icontains=request['filter']) |
             Q(experiment_name__icontains=request['filter']))
   try:
      query_response = query_response.order_by(order + request['ordering_value'])
   except Exception as e:
      pass

   total = query_response.count()
   query_response = query_response[start:end]

   channel.send({
      'text': json.dumps({
          'stream': view,
          'payload': {
              'request': request,
              'data': {
                  'experiments': [exp.to_dict() for exp in query_response],
                  'total': total
              }
          }
      })
   })
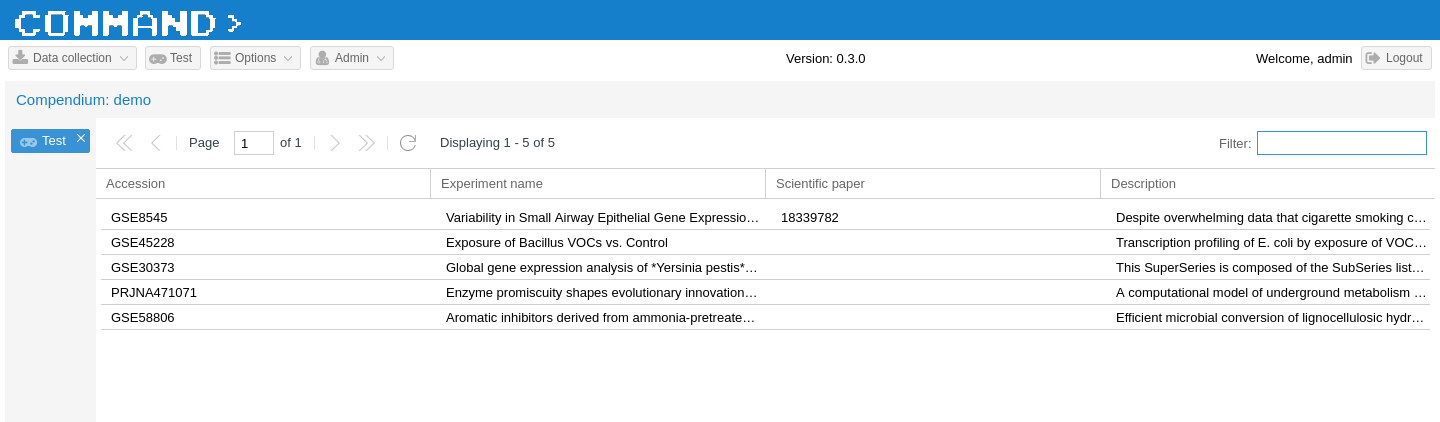
If you refresh your browser, you should now see something like the following:
As final step in this brief tutorial, let’s add a double-click event on the grid to call the test function defined in the TestView Python view to run an empty job on the Celery task manager. When the job is done we’ll have a callback function to show a message back on the interface. First thing is to add the event listener.
Create the Ajax call on double-click event
// Test.js

listeners: {
   itemdblclick: 'onTestDoubleClick'
},
Then we’ll need to implement the onTestDoubleClick in the TestController.js
// TestController.js

onTestDoubleClick: function(dv, record, item, index, e) {
     var grid = dv.up('grid');
     var gridSelection = grid.getSelection();
     var request = grid.getRequestObject('test');
     request.values = JSON.stringify(gridSelection[0].data);
     Ext.Ajax.request({
         url: request.view + '/' + request.operation,
         params: request,
         success: function (response) {
             command.current.checkHttpResponse(response);
         },
         failure: function (response) {
             console.log('Server error', reponse);
         }
     });
 }
Manage asynchronous code using Celery and WebSocket
The request object is configured to automatically retrieve the view name (request.view) and setted to call the test function in the Python TestView.
# test.py

 @staticmethod
 @forward_exception_to_http
 def test(request, *args, **kwargs):
     values = json.loads(request.POST['values'])

     comp_id = request.POST['compendium_id']
     channel_name = request.session['channel_name']
     view = request.POST['view']
     operation = request.POST['operation']

     test.test_task.apply_async(
         (request.user.id, comp_id, values['id'], channel_name, view, operation)
     )

     return HttpResponse(json.dumps({'success': True}),
                         content_type="application/json")
With the test.test_task.apply_async we are calling the test_task function from the Celery task file test.py (not to be confused with the Python view file that have the same name). We need to create this file and implement the functionality. So let’s create a file name test.py in the command/command/lib/task directory (here). The file will look like that:
# test.py

from __future__ import absolute_import, unicode_literals
from time import sleep
import celery
from channels import Channel
from command.lib.utils.message import Message


class TestCallbackTask(celery.Task):
    def on_success(self, retval, task_id, args, kwargs):
        user_id, compendium_id, path, channel_name, view, operation = args
        channel = Channel(channel_name)
        message = Message(type='info', title='Hello world!',
                          message='Hi there!'
                          )
        message.send_to(channel)

    def on_failure(self, exc, task_id, args, kwargs, einfo):
        pass


@celery.task(base=TestCallbackTask, bind=True)
def test_task(self, user_id, compendium_id, exp_id, channel_name, view, operation):
    sleep(1)
The test_task function simply wait for one seconds. When it’s done the on_success callback function gets called and it retrieve the WebSocket channel name to send back a simple message. That message will be captured on the client side and a pop-up will appear. Before trying it out we need to inform Celery that there’s an extra file to search for when calling a task. This is done in the Django setting file, here.
# settings.py

CELERY_IMPORTS = (
   'command.lib.tasks.experiment_public',
   'command.lib.tasks.experiment_local',
   'command.lib.tasks.uncompress_file',
   'command.lib.tasks.run_file_assignment_script',
   'command.lib.tasks.run_parsing_script',
   'command.lib.tasks.parse_bio_feature_file',
   'command.lib.tasks.run_platform_mapper',
   'command.lib.tasks.import_experiment',
   'command.lib.tasks.import_platform_mapping',
   'command.lib.tasks.export_data',
   'command.lib.tasks.test',
)
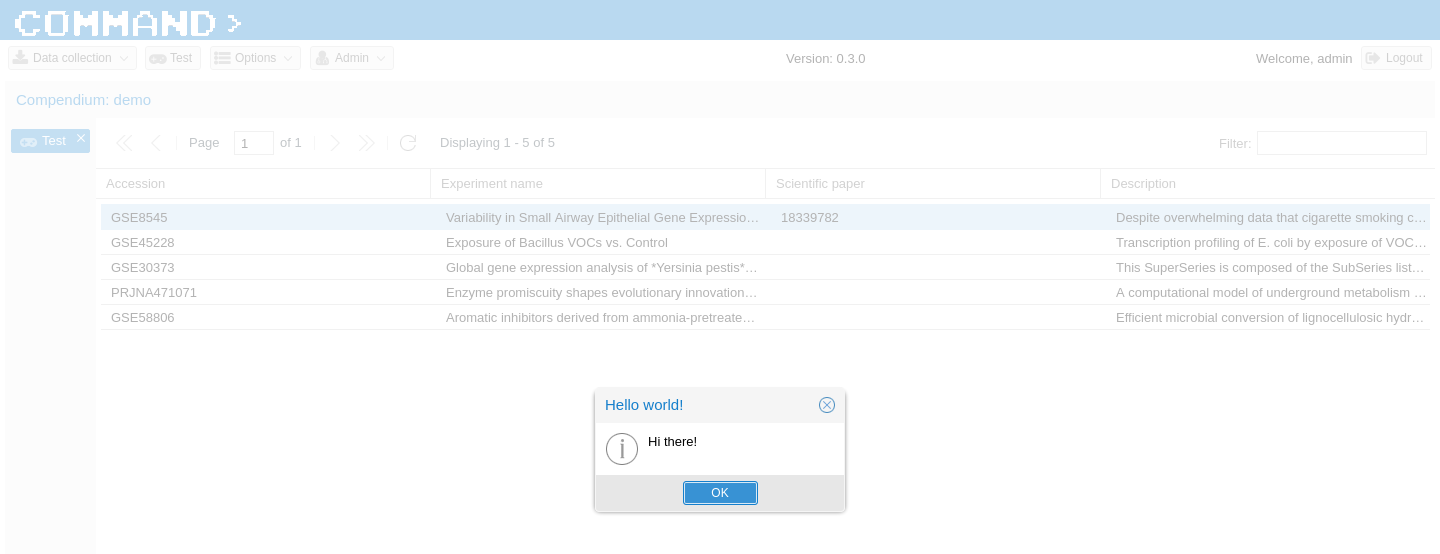
You should now be able to double-click on a grid value and see something like this.
Add new public database manager
At the moment of writing, COMMAND>_ is able to search on GEO, ArrayExpress and SRA.
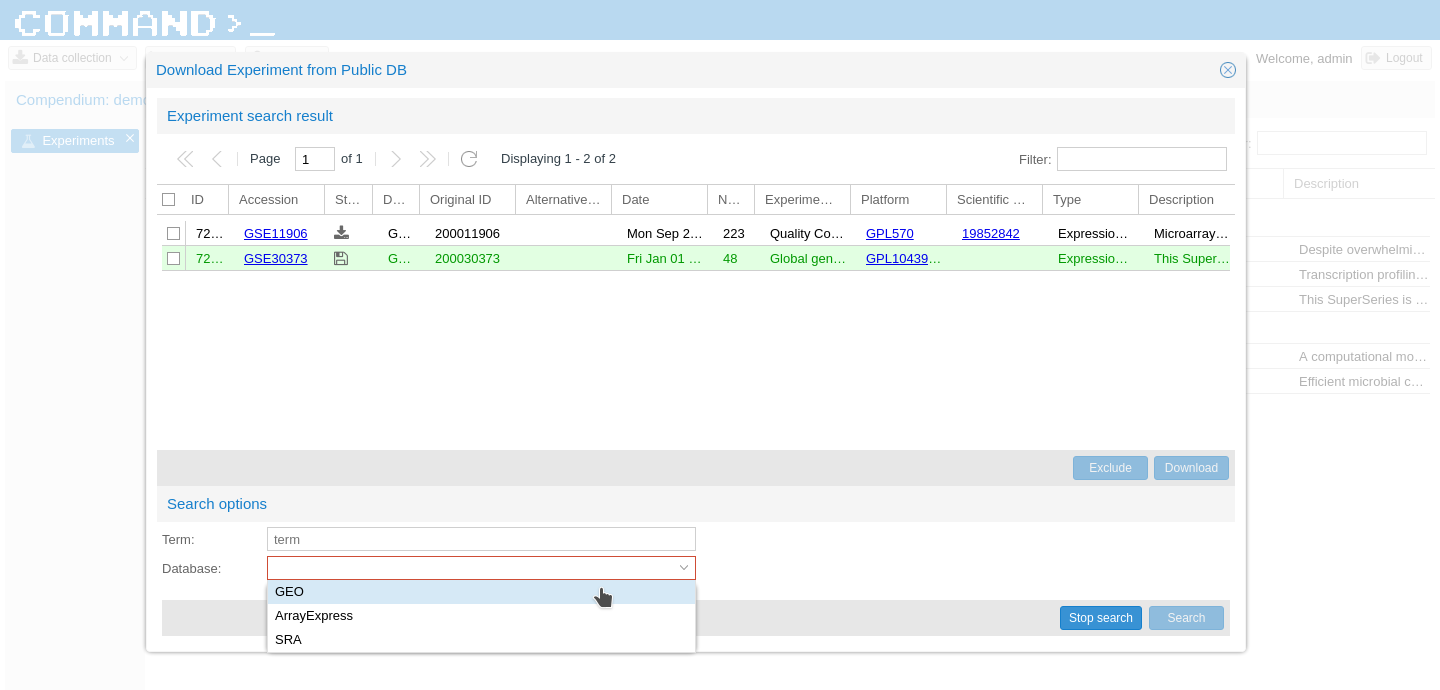
To add a new database on this list, you will need to add a line in a database table and extend one class. In the command_datasource database table you should add the source name and the class to handle it.

The class should be defined extending the class PublicDatabase that is defined here. This is an abstract class and to extend it you will need to implement three methods:
search: it perform the actual search on the public database (through a REST call or FTP for example) and create oneExperimentSearchResultfor each retrieved entry to be stored in the database;download_experiment_files: it is responsible to get all the data files related to one singleExperimentSearchResultand save them in the output directory;create_experiment_structure: starting from the information of the downloaded files, this method should create the experiment, platform, sample structures and save it usingExperiment,PlatformandSampleDjango models.
Add new compendium type
This is by far the easiest thing to do since it’s just a matter of adding one tuple on the command DB. The table to be modified is the command_compendiumtype table. At the moment
the only compendium type defined is the gene expression one. The fields are name, description and the biological feature name, so respectively gene_expression, Gene expression compendium and gene.

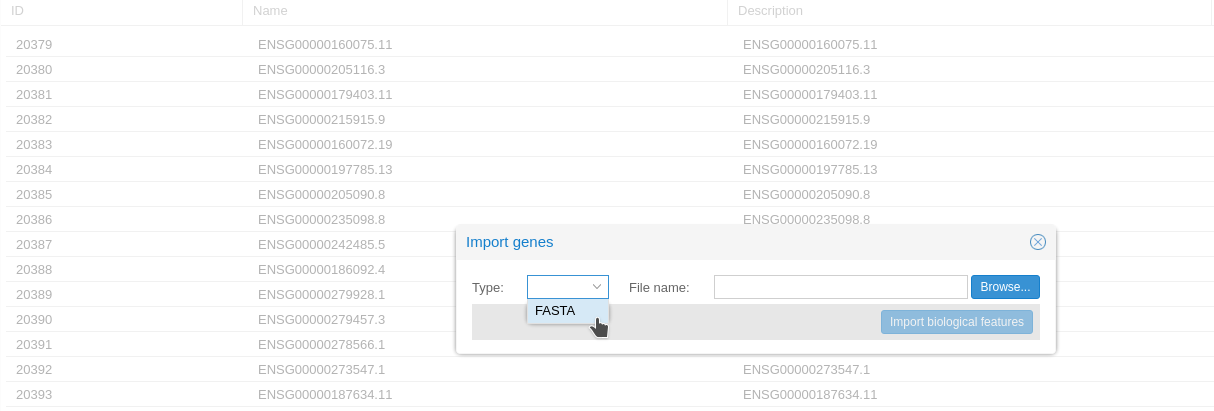
Add new biological feature file importer
All the classes releated to importing biological features are located here. First thing to do is to
inform the dispatcher in the importers.py file which are the classes responsible to manage different file types. For example, genes will be imported using FASTA files. The second step is
to actually implement the class extending the BaseImporter class. The newly defined class will need to implement the parse method and redefine the FILE_TYPE_NAME variable.
# fasta_file_importer.py

class FastaFileImporter(BaseImporter):
     FILE_TYPE_NAME = 'FASTA'

     def parse(self, filename):
         sequence_field = BioFeatureFields.objects.using(self.compendium).get(name='sequence')
         with transaction.atomic(using=self.compendium):
             with open(filename, 'rU') as handle:
                 for record in SeqIO.parse(handle, 'fasta'):
                     gene = BioFeature()
                     gene.name = record.id
                     gene.description = record.description
                     gene.save(using=self.compendium)
                     bf_value = BioFeatureValues()
                     bf_value.bio_feature = gene
                     bf_value.bio_feature_field = sequence_field
                     bf_value.value = str(record.seq)
                     bf_value.save(using=self.compendium)
Add new platform type
To add a new platform type there are several step to do and mostly depends on the kind of platform is going to be added.
Database entry
To add a new platform type for a single compendium (organism) you will need to add a tuple with name, description, bio feature reporter name and the compendium type ID, for example:
microarray, MicroArray, probe and 1 to the command_platformtype table. If you want every new compendium you are going to create to have such new platform you will need to add the same tuple to the
command_platformtypeadmin table in the command DB.

Reporters ExtJS GUI
Next step will be to inform the GUI how to behave when the user wants to see the biological feature reporters associated with the new platform. For example in case of Microarray the
biological feature reporters are the probes. The file to modify is PlatformController.js (defined here).
onViewBioFeatureReporter is the method to modify adding a new case for the new platform. For example in case of RNA-seq we simply display a message to say there’s no associated
biological feature reporters since the gene expression measurement in this case is directly given by read counts. For Microarray instead we have probes and thus we will open a new
window to show the probes associated with this platform, the window_bio_feature_reporter window.
// PlatformsController.js

onViewBioFeatureReporter: function (me) {
    var selection = me.up('grid').getSelectionModel().getSelection()[0].data;
    var comp = JSON.parse(localStorage.getItem("current_compendium"));
    if (selection.platform_type) {
        switch (selection.platform_type.name) {
            case 'rnaseq':
                Ext.MessageBox.show({
                    title: 'RNA-seq platform',
                    msg: 'For RNA-seq platform ' + selection.platform_access_id +  ', ' +  comp.compendium_type.bio_feature_name + ' is/are directly measured',
                    buttons: Ext.MessageBox.OK,
                    icon: Ext.MessageBox.INFO,
                    fn: function (a) {
                    }
                });
                break
            case 'microarray':
                var win = Ext.create({
                    xtype: 'window_bio_feature_reporter',
                    title: 'Microarray platform ' + selection.platform_access_id + ': ' +
                        comp.compendium_type.bio_feature_name + ' feature reporters (' + selection.platform_type.bio_feature_reporter_name + ')',
                    platform: selection
                });
                break
        }
    }
Add new platform mapper
When a platform has biological feature reporters associated, these must be mapped to the biological features. In case of gene expression compendium the biological features are genes. So to give a concrete example we will need to associate Microarray probes to genes. This step is very platform-dependant and so a lot of freedom is left to the developer to design the GUI. There are just few things to keep in mind in order to have everything working correctly within the COMMAND>_ framework.
Mapper ExtJS GUI
First thing will be to inform the GUI how to behave when the user wants to map this platform reporters to the biological features. The file to modify is again the PlatformController.js (defined here),
but this time we are going to modify the onMapPlatformToBioFeature method, adding a new case for the new platform. For Microarray we defined a new window window_map_microarray_platform
here. Again, in this case the developer is left completely free to design it as he wants.
// PlatformsController.js

onMapPlatformToBioFeature: function (me) {
    var selection = me.up('grid').getSelectionModel().getSelection()[0].data;
    var comp = JSON.parse(localStorage.getItem("current_compendium"));
    if (selection.platform_type) {
        switch (selection.platform_type.name) {
            case 'rnaseq':
                Ext.MessageBox.show({
                    title: 'RNA-seq platform',
                    msg: 'RNA-seq platform ' + selection.platform_access_id +  ' is automatically mapped to ' + comp.compendium_type.bio_feature_name,
                    buttons: Ext.MessageBox.OK,
                    icon: Ext.MessageBox.INFO,
                    fn: function (a) {
                    }
                });
                break
            case 'microarray':
                command.current.createWin({
                    xtype: 'window_map_microarray_platform',
                    title: 'Map microarray platform ' + selection.platform_access_id + ' to ' + comp.compendium_type.bio_feature_name,
                    platform: selection
                });
                break
        }
    }
Mapper Django View
The associated Django View is defined in platform.py view file here and for Microarray this is the MicroarrayPlatformView class.
This is pretty standard view as described previously.
Mapper code
The actual code is stored in a class that will extend the BaseMapper (placeholder) class. For Microarray this class is MicroarrayMapper and is located here.
Last step is to inform the mapper dispatcher on which class to invoke, and this is done in the mappers.py file located here.
// mappers.py

from command.lib.coll.platform.microarray_mapper import MicroarrayMapper

platform_mapper = {
    'microarray': MicroarrayMapper
}